Pages

Friday, July 25, 2014

Decorating: A Cup of Flowers

          
A Cup of Flowers 
Circa: 2014

          I love having fresh flowers in our home, it just adds a touch of natural beauty and life to the space.  The surprising thing is that I rarely use vases, and actually only have a handful in the house. Oddly enough, this began at me wedding three years ago.  I knew that I didn’t want standard vases for my floral arrangement and I tried to find a vintage alternative. As I was going through my grandmother’s house I noticed that she had a beautiful flower arrangement in an old champagne bucket!  After that I was sold! We began collecting old silver pieces like mint julep cups (my personal favorite), tea pots, sugar bowls and more, and I haven’t looked back since! I wanted to pass on my love of vase alternatives to you today and instead of giving away all of my secrets at once, I thought that I would share a little at a time. So today I am sharing with you how to use items from your everyday tea cart.


             Whenever my husband or his family travels to London they always bring me back tea and biscuits from Harrods! I have a slight tea addiction; Early Grey is my favorite! The tea canisters are beautiful and I haven’t ever had the heart to throw them away.  While they are technically not “vintage” they have a lovely classic aesthetic. My only word of caution is to make sure that they don’t leak. I had a problem with the first canister I used and, unfortunately, it leaked all over one of my vintage books. Heartbreak: though it only damaged the cover and the interior pages remained dry. The purple canister looks so pretty with the beautiful white hydrangea. I love using hydrangeas because a little goes such a long way!
             The next items that I love to use if I need a small arrangement are vintage tea cups! Not only can they fit the smallest of flowers from your own backyard, they also take me back to when things were a little bit simpler.  Since I was in middle school I have collected vintage tea cups. I believe it started when I was a very small girl and I would take my coffee with cream and sugar in my great-grandmother’s tea cups.  And yes, I was very lucky to have daily afternoon coffee or tea in elementary school in a porcelain tea cup. It explains so much. Tea cups feel so dainty and lady like and they are a beautiful addition to a table. The tea cup pictured here belonged to my great grandmother. I love the rose pattern and soft pinks and greens.

             Finally, a tea pot can make a beautiful vase! While I have too many to name, I chose to highlight one of my more unique pieces, and the purple looked beautiful beside my canister. I have to give props to my mother who purchased this for me at an estate sale. The tea pot depicts the Boston Tea Party, which is rather ironic! While it is one of my favorite pieces, I also adore my silver tea pots as well! While they are not pictured, one of the other items I frequently turn to are my sugar bowls from my silver pieces to my beautifully green Depression glass bowl! The possibilities are really endless!
             As always, please be cautious on the pieces that you choose and handle them with care. If you have a treasured one-of-a-kind teapot from your great-great grandmother than  you may want to opt for a fantastic estate sale find instead! I hope that this inspires you in the future to put away the vase and turn to something a little different and vintage! I hope that you have a lovely weekend!

Wednesday, July 23, 2014

Recipes: Hemingway's Gin and Tonic

Hemingway's Gin & Tonic 
Circa: 1930's


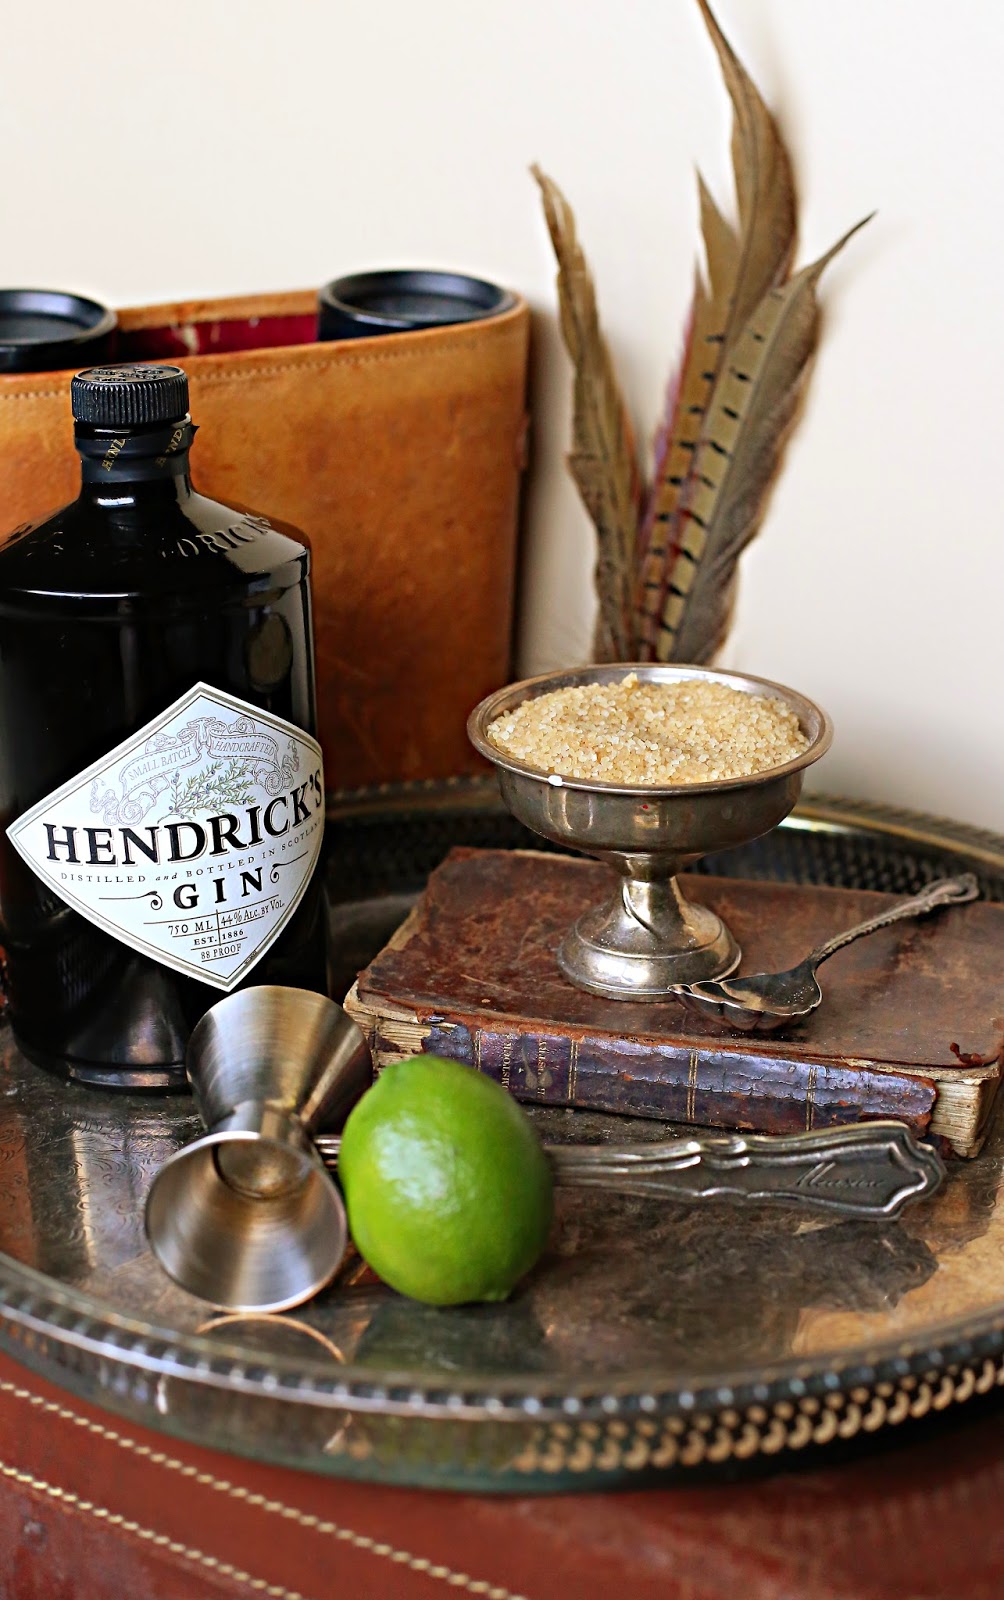
      Today I am sharing with you my go-to drink for the summer! I must give credit to my husband for introducing this delicious drink to me. As many know, Texas this time of year can only be described as HOT! Therefore, the cooler and more refreshing the cocktail, the better. Knowing that my spirit of choice is gin he shared this recipe with me and I have been hooked ever since. Legend states that this was one of famed author Ernest Hemingway's favorite drinks and hangover cures. Hemingway made the drink his own concoction with the addition of Angostura bitters to the classic gin and tonic.  Since I prefer my drinks a little bit sweet,  I added in a little spoonful of Turbinado sugar. Whether you like yours sweeter or not, the drink is still delicious.  Now, as you sip here is your history for the day! 

         The history of tonic water is fascinating!  In 1638 when the wife of the Spanish Viceroy in Peru fell ill with malaria her husband pleaded with the local Incas for an antidote. They instructed her to drink a potion containing the ground bark of the native Quinquina Tree, what we would call the first dose of quinine. Luckily for the countess, the potion worked and she made a full recovery.  Later in 1825 the British military wished to improve the taste of their very bitter, anti-malarial quinine so they decided to combine it with water, sugar, tonic and gin, a very popular British spirit! Rather than taking their medicine with the troops in the morning, the officers began enjoying theirs at cocktail hour.  The classic Gin and Tonic was born! It would become the quintessential drink of the expansive British Empire. 


     Finally, I thought I couldn't leave you without a little information about our own cocktail's namesake, Ernest Hemingway!  He was born on July 21, 1899 in Cicero, Illinois. While he was raised in the suburbs of Chicago, his family's frequent trips to their cabin in northern Michigan fostered the future sportsman's love of hunting, fishing and an appreciation of the outdoors. 

     Hemingway worked as a journalist before serving (and being wounded) in World War I as an ambulance driver in the Italian Army.  His wartime experiences later inspired his famous novel, A Farewell to Arms.  After the war, Hemingway moved to Paris and became a key part of what Gertrude Stein called "The Lost Generation." Some of his acquaintances included F. Scott Fitzgerald, Ezra Pound, Pablo Picasso and James Joyce. In 1925 after a trip to a festival with British and American expatriates Hemingway was inspired to pen one of his greatest works The Sun Also Rises

     In 1928 Hemingway moved back to America and settled in Key West Florida and continued his writing. When he wasn't working Hemingway spent much of his time chasing adventure and big game hunting in Africa, bullfighting in Spain, and deep-sea fishing in Florida. He went back to the battlefield as a war correspondent reporting on the Spanish Civil War in 1937.  His experiences again inspired a classic; this time, For Whom the Bells Tolls.   He later even used his fishing boat to help look for Nazi submarines in the Caribbean during World War II.

     In 1951 Hemingway received a Pulitzer Prize for his book The Old Man and the Sea and a Nobel Prize for his collection of works in 1954. Sadly as he grew older his mind and body began to fail him. He retired permanently to Idaho and early on the morning of July 2, 1961, Ernest Hemingway committed suicide. 

     Though it's a sad end to an incredible man, his legacy of enjoying life  keeps going.  So seize the day and enjoy your own Hemingway Gin & Tonic while enjoying one of Papa Hemingway's classics!


Sources
www.biography.com 
http://qtonic.com

Monday, July 21, 2014

Inspiration Board: Victory Garden Birthday

Victory Garden Birthday
Circa: 1940's


      Well this is reaching you a few days later than planned but it was worth the share this week! While working on our D.I.Y. Victory Garden for kids it struck me that this would be a wonderful activity/party favor for a Birthday Party! At the museum we have several fun themed birthday parties for children and the 1940's is one of the periods in history that we celebrate. Therefore, I decided to create my first Inspiration Board around that theme. I know there is a concern for younger children when it comes to war therefore this party focuses on life on the home front and the role that children played to help with the war effort! 

     For more information on Victory Garden's please look at my D.I.Y Victory Garden in a previous post! I have included some additional ideas for your own 1940's party below. Please enjoy! 

Music: You can't go wrong with big band classics from the period such as In the Mood,  I'll Be Seeing You, Chattanooga Choo Choo, and my personal favorite Sing, Sing, Sing! I feel that music is so important and really sets the mood for a great party! 

Refreshments: During the war, there were shortages of various types of food that affected families on a daily basis. Due to these shortages the U.S. Government Office of Price Administration established a system of rationing to fairly distribute foods in short supply. While this doesn't mean that you have to serve Eggless Cake at your party, it could be fun to try to shape your menu to what families would have served during the time period. After looking over some old recipes here are a few suggestions: Fresh Vegetables and dip, fruit, hamburgers, Victory Fries (French Fries), Salad, Cookies and of course Birthday Cake!  I know that today parties aren't complete without a candy bar or goody bag so I thought I would include a few of the new American candies introduced during the 1940's:

  • M&M's (1941) 
  • Tootsie Rolls (1942)
  • Junior Mints (1945) 
  • Almond Joy (1947) 
  • Smarties (1949) 

Additional Activities:  The 1940's offers so many wonderful activities for children that it was hard to choose just a few but here are some of my favorites. One of my favorite crafts, that I will probably share in the future, is to make Victory Parachutes from a few pieces of scrap fabric and string. You can even turn it into a game by having guests, with adult supervision of course, go to the top of the stairs and drop their parachutes and aim for targets placed below. Another favorite activity is to split the children up into two teams and give each team a copy of Morse Code and a Flashlight. Have each team go to opposite sides of a dark room or hallway and use their flashlights to send messages back and forth to each other. Favorite games from the time included marbles, dominoes, hide and go seek, hopscotch and of course America's favorite pastime Baseball! There are so many options available that the possibilities are endless! 


     I hope that this Inspiration Board inspires you to host your own 1940's Victory Garden Birthday Party! Have a great week! 


Sources 

Left Row (Top to Bottom) 
1. Martha Stewart.com 
2. Pottery Barn 
3. Modern Farmer
4. Style Me Pretty http://www.stylemepretty.com/2010/08/02/summer-garden-party-inspiration/

Middle Row (Top to Bottom) 
1. Etsy-Vintage Vendor 
2. Etsy 
3. Rent My Dust 
4. Celebrating the Moments by Marcie
5. Etsy-Idoityourself

Right Row (Top to Bottom) 
1. Celebrating the Moments by Marcie 
2. Etsy-Kolorize
3. Linda L. Floyd 

Tuesday, July 15, 2014

D.I.Y.: Victory Garden in a Jar

Victory Garden in a Jar
Circa: 1940's


      I couldn't be more excited to be bringing you not only my first D.I.Y. project that is specifically designed for kids, BUT it is one of my all time favorite projects! This week at the museum we are gearing up for our first round of Summer History Week, which is such an exciting and fun time! Last year we introduced a new program about life in the 1940's and I created this project for our hands-on activity based on an idea created for Molly of the American Girl Collection. When I was a little girl I was obsessed with American Girl; Samantha was my favorite, and I still turn to my old books and magazines for inspiration to this day! For our first project we are making Victory Gardens that are perfect for summer! 

     During World War I and World II the government was forced to ration foods like sugar, milk, butter, cheese, coffee, meat and canned goods. In addition labor and transportation shortages made it hard to transport fruits and vegetables to market. Therefore, the citizens were encouraged to plant Victory Gardens to provide their own fruits and vegetables and ensure adequate food supply for civilians and troops! Over 20 million Americans planted gardens in their backyards, empty lots, baseball fields, rooftops and even school yards.  The gardens planted on school grounds actually used the produce in their school lunches!  During this time most people ate local produce grown in their very own communities, a trend that is growing in popularity today!

             Magazines of the day such as the Saturday Evening Post and Life began printing instructions and stories about victory gardens and tips on preserving their produce. Many different types of vegetables were grown such as tomatoes, beets, peas, carrots, and lettuce.With families beginning to can their own food it left more commercially canned goods available to the troops! In 1943 315,000 pressure cookers were purchased by families specifically for the purpose of canning! 

             Did it help? Well, the US Department of Agriculture estimates that more than 20 million victory gardens were planted and 9-10 million tons of fruits and vegetables were harvested which was an equivalent of all commercial production! As they say the past is never really past and today many people are beginning to shop locally for their fruits and vegetables or even grow and can their own! This is a wonderful way to get your little ones growing! 

Materials

-Pint mason jar with metal Lid
-Spoon
-Bowl
-1 cup gravel
-1-2 cups potting soil
-Water
-3-4 Herb seeds (Chives, Parsley, Basil, or my favorite Mint)
-Hammer and Nail
-Small Bowl


Directions

1. Place soil in bowl, add a little water and stir. You want your soil to be slightly damp.

2. Spoon your gavel into your mason jar.


3. Add your soil to the jar until it is approximately 1 inch deep.


4. Add your herb seeds and gently cover them with the soil.

5. With the help of an adult, hammer air holes into the top of your metal lid. Place the lid on top of your jar. 


6.  Place the jar in a sunny window or somewhere it will get full light.  Be sure to remove the lid once the greens begin just touching it.  Keep watering and placing in the sun.  Then enjoy and use in your favorite recipes.


Sources

American Girl 


Thursday, July 10, 2014

Thank You

Thank You
Circa: 2014


       I just wanted to take a moment and say a big thank you to all of my new fans! Yesterday was incredible! When I first imagined this blog I thought it would be amazing to have 50 followers. To now have over 300 is truly a blessing. This blog has been a dream of mine for the past year. I have always loved cooking, decorating and entertaining for my friends and family but I never dreamed of sharing it with so many people. However, thanks to the encouragement of my very dear friends and family this blog went from a simple dream to become a reality! 

      I want to say a special thank you to one of my best friends Tara Swain for sharing my page. She is not only an incredible photographer but she is an incredible and wonderful person and I am blessed to call her a friend. I am sure that you are all familiar with her work but if not please check her out at www.taraswain.com. 

       Again, thank you so much to everyone that liked my page yesterday, I was truly amazed at the outpouring of love and support!  I feel so very blessed! I am so thrilled to have you join me on this journey and seeing my dream come to life! Peace and love always! 

Wednesday, July 9, 2014

Recipe: Old Fashioned Sugar Cookies

Sugar Cookies 
Circa: 1700's 


           Since today is National Sugar Cookie day I thought that there was no better time to share a great sugar cookie recipe and a little history behind this sweet treat! Oddly enough, many historians actually believe that the origin of cookies arose out of necessity rather than want. Before the creation of our more modern stoves bakers throughout history worked with ovens heated by fire. Finding the right temperature could prove difficult when you weren’t able to turn a dial or even better punch in 350 degrees. In order to test the heat they began baking a small amount of batter to ensure they had the correct temperature. Well, who could resist a mini cake… no one! So bakers began selling the mini-cakes and the cookie was born. However then they were known by many names including jumbles, cry babies, plunkets, gemmels and even gimblettes! However a cookie by any other name is still a cookie!

          The cookie’s arrival to America has been attributed to Dutch settlers in New York who made a small cake known as a koekje pronounced cookie.  While there were similar cakes found in Europe the koekje was unique because it utilized a new innovation at the time: chemical leavening. The alkali leavener pearlash was first in use in the 18th century around New York City and the first published recipe for “cookies” appeared in 1796. In the days before modern refrigeration and food preservation, non-leavened food grew in popularity because it could be dried and stored for many months.

          The modern sugar cookie we have all grown to love dates back to the 1700s in Nazareth, Pennsylvania. German Protestant settlers created a crumbly, buttery round cookie that became known as the Nazareth Sugar Cookie. Over the years the Nazareth Sugar Cookie grew in popularity leading to House Bill of 1892 that made it the official cookie of the Commonwealth of Pennsylvania.

          With the rise of industry and processed food, the sugar cookie gained the delicious addition of vanilla! Before this ingredient became a pantry staple it was very expensive and difficult to acquire. Now with artificial vanilla widely available and affordable people began adding it to everything! By the 1920s people were using it so much that it became known as “plain vanilla!” Over time the cookie continued to grow in popularity and in 1948 Betty Crocker’s Cook Book included a recipe for Rolled Sugar Cookies and it has been a family favorite ever since! So put on your cute vintage apron head to the kitchen and celebrate National Sugar Cookie Day!


I had to include this cute behind the scenes shot! She always joins me when I am shooting, especially if there is food involved! 

Thursday, July 3, 2014

Recipe: The Redcoat Cocktail

The Redcoat
Circa: 1776


           We are having a few friends over to the house tomorrow to celebrate the 4th of July and I thought that it would be fun to have a signature cocktail for the festivities! July in Houston means very warm days so I wanted to have something very light and refreshing for guests that also took advantage of the beautiful and delicious fruits that are in season! When I was testing out recipes for my 4th of July cocktail a friend commented that I was using traditional British spirits for a uniquely American celebration. I happen to love using Pimms Cup No.1 and Gin for cocktails this time of year and I didn’t even realize that they were right! But since we are serving an All-American menu ending with a very patriotic red, white, and blue dessert I thought why not have British-inspired cocktails and tell the whole story of the American Revolution and our fight for Independence. So that is how the name and concept of this cocktail came to be. I present to you The Redcoat!
             Of course I can’t leave you without a little bit of background information and history that you can read while sipping your cocktail. I thought it would be fun to do a little research and find out more about the Redcoats in honor of our drink! The dictionary defines Redcoat as a British soldier especially in America during the Revolutionary War. The red uniform was officially adopted by the Parliament of England in 1645 when they passed the New Model Army ordinance. The infantry wore coats of Venetian red with white facings. While red uniforms are by no means exclusive to the British Army, their extensive use of this color over a period of nearly 300 years has made it an icon of the British Empire.
             Why red? One of the main reasons for choosing the vibrant color was the fact that russet and crimson dyes were relatively cheap to produce. Roots of the madder plant were dried, crushed and hulled to produce the red colored dye. In addition there was a growing popular sense that red was the national English color. It has also been said that they believed the red would hide blood stains; however this has proven to be a myth.
             While today most people wouldn’t choose bright red for a military uniform because it would make a soldier easy to spot from across the field….well in the 18th century that was the whole point! Surprised?  During a time where a musket had a limited range and accuracy and battlefield visibility was obscured by clouds of smoke the bright red uniform helped commanders and fellow troops distinguish friend from foe!
             In parting I want to wish everyone a very Happy 4th of July filled with friends, fireworks and maybe even a few Redcoats!  


Tuesday, July 1, 2014

Holiday Decorating: Fourth of July

Decorating With Military Memories
Circa: 1776-2014


          The 4th of July is just around the corner and I couldn't be more excited! It’s not only a day of celebration with friends and family and fireworks but a day of remembrance and celebrating our freedom and independence! Of course I also love any occasion to decorate and holidays are my favorite! For the 4th of July I decided to highlight some of our family's old military memorabilia. I know that many of us have our fathers, grandfathers or great-grandfather’s photographs, military papers, letters, medals, and more tucked away for safe keeping. Now don’t get me wrong, as a lover of history and antiques I strongly encourage preservation and handling this objects with care however, I also believe in displaying these treasured items in your everyday life or for special occasions.

          When I was preparing to decorate our house for the 4th of July rather than run out to the store I first turned to what we had on hand at the house. My wallet and husband were happy!  I started off with the large objects that were scattered about such as my World War II Souvenir pillow, a framed copy of my grandfather’s naval class picture, a beautiful American flag scarf from a friend, my husband’s saber and hat from college and more! Next, I headed into my photo albums and trunk for family items from World War II. I found several pictures, postcards, medals, and even my great-grandmother’s ration book.  After I had picked out several items I began placing them around the house and they really added a more personal and meaningful touch to our holiday decorations.  

          Now, I know that the thought of displaying your grandfather’s military papers or letters scattered around the house for all to see and TOUCH can cause some concern! I completely understand, I am the person that cringes when I watch antique shows and someone is turning the pages of a 300 year old book with their bare hands! The solution is actually really simple:  quality photocopies.  For example, one of the things that I did for my wedding and continue to do today is make good quality, color copies of my more delicate items. At our wedding we wanted to display pictures of our family but we didn't want to risk having the originals misplaced or damaged so we made copies of all of the older pictures that we wanted to use. I still use those copies today in many of my decorations and if they are damaged there is no fear because the original is safe! So if you have any paper items or photographs that you don’t feel comfortable displaying simply make a copy and protect the original!

          I hope this inspires you to share some of your family treasures throughout the holiday season! Have a very Happy 4th of July and thank you for stopping by!


P.S. The flag in the entry way was one of my favorite finds at an antique store in Paris, Texas. It is displayed all year round but it is perfect for the 4th of July! From the markings on the top we know it flew in the Pacific before World War II!